8 Easy Steps to Install Ceiling Boards Like a Pro – A Complete Guide by SLD
When it comes to upgrading your interior, few improvements have as much impact as installing Ceiling Boards. Whether you're renovating a home, office, or commercial space, Ceiling Boards offer both aesthetic charm and acoustic benefits. At SLD, we specialize in producing premium Mineral Fiber Ceiling Boards that are fire-resistant, moisture-resistant, and easy to install.
In this step-by-step guide, SLD walks you through how to install Ceiling Boards like a professional—ensuring flawless results every time.
Why Choose Ceiling Boards from SLD?
SLD's Ceiling Boards are designed with both performance and appearance in mind. Made from high-density mineral fiber, our products offer:
Excellent sound absorption
Fire resistance
Mold and moisture resistance
Lightweight and easy handling
Compatibility with standard grid systems
Whether you're a seasoned contractor or a DIY enthusiast, SLD makes ceiling installation easier than ever.
Tools and Materials You’ll Need
Before you begin, gather the following tools and materials:
Mineral fiber Ceiling Boards (from SLD)
Ceiling grid system (T-bars)
Measuring tape
Level
Utility knife
Tin snips (for cutting metal grid)
Ladder
Chalk line
Safety gloves and glasses
Step-by-Step Guide to Installing Ceiling Boards
Step 1: Plan and Measure Your Space
Use a measuring tape to determine the dimensions of the ceiling. Mark out the center point using a chalk line to ensure symmetrical placement of the Ceiling Boards.
Step 2: Install Wall Angles
Using a level, install the perimeter wall angles around the room. These metal strips support the outer edge of the grid system.
Step 3: Snap the Main Runners into Place
Attach the main runners (primary grid pieces) to the wall angles and secure them with hanger wires from the ceiling joists or beams.
Step 4: Add Cross Tees
Snap in cross tees between the main runners to form a grid layout. Each grid cell should match the size of your Ceiling Boards (commonly 600mm x 600mm or 600mm x 1200mm).
Step 5: Check for Level and Adjust
Ensure the grid is level using a spirit level. Make any adjustments needed before placing the boards.
Step 6: Cut Ceiling Boards to Size (if needed)
Use a utility knife to trim any Ceiling Boards for edge pieces or special shapes. SLD’s boards are easy to cut without crumbling.
Step 7: Place the Ceiling Boards
Gently lift each board above the grid and drop it into place. Handle with care to avoid breaking corners.
Step 8: Final Inspection
Inspect the entire ceiling for alignment, level, and completeness. Make adjustments if necessary and clean up any debris.
Maintenance Tips After Installation
Regularly dust the Ceiling Boards to maintain appearance
Replace any stained or damaged boards immediately
Ensure proper ventilation to avoid excess moisture buildup
Avoid hanging heavy fixtures from the boards directly
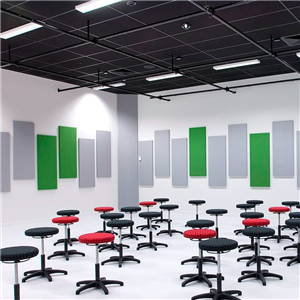
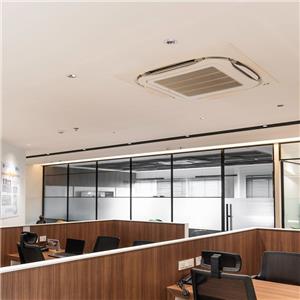
Where Can You Use SLD Ceiling Boards?
SLD’s mineral fiber Ceiling Boards are perfect for:
Offices
Schools and Universities
Retail Stores
Hospitals and Clinics
Hotels and Restaurants
Residential Basements and Kitchens
Their moisture resistance and fireproof features make them ideal for almost any interior.
Conclusion: Achieve Professional-Grade Ceilings with SLD
Installing Ceiling Boards doesn't need to be complex. With high-quality products from SLD and the right tools, anyone can achieve a sleek, sound-absorbing, and fire-safe ceiling. Our mineral fiber solutions combine performance with design to give your space a polished and professional look.
Contact SLD today to find out more about our ceiling systems and product catalog.